Let’s add the Dates panel. The Dates panel will have a list of relative
dates beginning with today and going back to five days ago (Figure 1). Add the HTML for the Dates panel (shown in
Example 1) right after the About panel, just before the closing </body> (in a moment, I’ll show you how
to add a link to this from the Home panel).Example 1. The HTML for the Dates panel
<div id="dates">
    <div class="toolbar">
        <h1>Dates</h1>
        <a class="button back" href="#">Back</a>
    </div>
    <ul class="edgetoedge">
        <li class="arrow"><a id="0" href="#date">Today</a></li>
        <li class="arrow"><a id="1" href="#date">Yesterday</a></li>
        <li class="arrow"><a id="2" href="#date">2 Days Ago</a></li>
        <li class="arrow"><a id="3" href="#date">3 Days Ago</a></li>
        <li class="arrow"><a id="4" href="#date">4 Days Ago</a></li>
        <li class="arrow"><a id="5" href="#date">5 Days Ago</a></li>
    </ul>
</div>
|
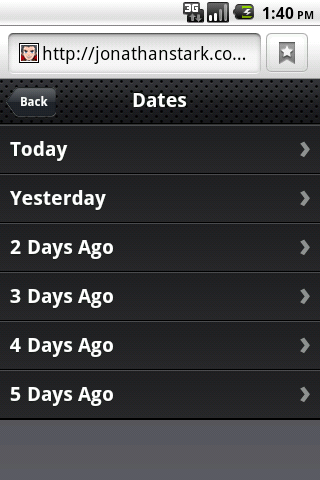
Like the About panel, the Dates panel has a
toolbar with a title and Back button. After the toolbar, there is an
unordered edgetoedge list of links. Notice that all of the
links have unique IDs (i.e., 0 through
5) but the same href (i.e.,
#date)—more on that in a bit.
Next, you have to update the Home panel with a
link to the Dates panel. Add the line shown in bold to the Home panel in
index.html:
<div id="home">
    <div class="toolbar">
        <h1>Kilo</h1>
    </div>
    <ul class="edgetoedge">
        <li class="arrow"><a href="#dates">Dates</a></li>
        <li class="arrow"><a href="#about">About</a></li>
    </ul>
</div>
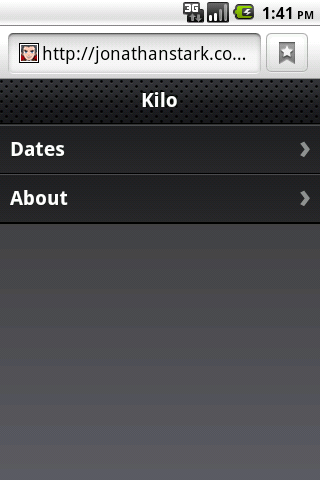
And just like that, we’ve added a new panel to
the app (Figure 2). Clicking on an
item on the Dates panel doesn’t do anything yet. Let’s rectify that
situation by adding a panel to display a date item (the Date panel).